
Teaching ChatGPT about the birds and the bees
TL;DR: In this blog post, I want to teach ChatGPT about the birds and the bees… by having it train its own classification algorithm!
I’ll be working with ChatGPT to fetch the data directly from the internet, pre-process it, train a model and evaluate it. Overall, GPT does an incredible job! I ran in to a few bugs along the way, some were from GPT, some were my own fault. There was one completely SILENT bug that took me a while to figure out. I blame myself, but also GPT for not thinking of it. I’ll let you be the judge :)
This post is lengthy, and is pretty representative of what happened overall. You can find all the code we wrote together in this colab.
Birds and Bees
From what I’ve seen so far, the best way to interact with GPT is to be explicit and describe everything we want to do, so let’s go for it!
Me:
Today, we are going to be implementing an image classification algorithm from scratch together. I will be guiding you step by step and you will be giving me instructions and code to run in order to solve the task. We will need to download data from the internet, pre-process it, declare our models and optimizers and train our model. I will be guiding you step by step through the process. First, let’s define the task. We will be programming a classifier to differentiate between birds and bees. The first thing you need to do is write a python script that can download 100 images of birds and 100 images of bees to a folder called “data”. Place the bird images in a subfolder called “birds” and the bees in a subfolder called bees”.
GPT:
To download images from the internet, we can use the Python urllib library. We can first use the urllib.request.urlretrieve method to download each image one by one, and then use the os library to create the necessary directories and move the images to the correct subfolders. Here is some sample code that you can use to download and save the images:
import os
import urllib

# Create the directories if they don't already exist
if not os.path.exists("data"):
    os.makedirs("data")
if not os.path.exists("data/birds"):
    os.makedirs("data/birds")
if not os.path.exists("data/bees"):
    os.makedirs("data/bees")

# Create a list of URLs for the bird images
bird_urls = [
    "http://example.com/bird1.jpg",
    "http://example.com/bird2.jpg",
    # ...
]

# Download the bird images and save them to the "data/birds" directory
for url in bird_urls:
    urllib.request.urlretrieve(url, "data/birds/{}".format(url.split("/")[-1]))

# Create a list of URLs for the bee images
bee_urls = [
    "http://example.com/bee1.jpg",
    "http://example.com/bee2.jpg",
    # ...
]

# Download the bee images and save them to the "data/bees" directory
for url in bee_urls:
    urllib.request.urlretrieve(url, "data/bees/{}".format(url.split("/")[-1]))
This code will download the images from the URLs in the bird_urls and bee_urls lists, and save them to the appropriate directories. However, you will need to replace the URLs in the bird_urls and bee_urls lists with actual URLs for bird and bee images. You will also need to make sure that the lists contain 100 URLs each.
Getting the Images
So far, so good… But I really don’t want to gather links manually. I found this page on wikicommons with a bunch of bird images and this page with bees. However, I don’t want to parse these manually… Let’s see if GPT can help us:
Me:
Before we continue, I want you to write a python script which will extract all of the href links from a given wikipedia webpage, but only the the href links that have a .jpg extension.
GPT:
To extract links from a webpage, we can use the Python urllib and BeautifulSoup libraries. The urllib library can be used to download the HTML content of a webpage, and the BeautifulSoup library can be used to parse and extract information from the HTML. Here is an example of how you can use these libraries to extract all of the href links with a .jpg extension from a given Wikipedia page:
import urllib
from bs4 import BeautifulSoup

# The URL of the Wikipedia page
url = "https://en.wikipedia.org/wiki/Bee"

# Download the HTML content of the page
html = urllib.request.urlopen(url).read()

# Parse the HTML content with BeautifulSoup
soup = BeautifulSoup(html, "html.parser")

# Extract all of the <a> tags with a .jpg extension in the href attribute
links = soup.find_all("a", href=lambda x: x and x.endswith(".jpg"))

# Print the href attribute of each link
for link in links:
    print(link["href"])
This worked great. But then I hit my next bug. Apparently you can’t just bulk download from wikicommons (makes sense):
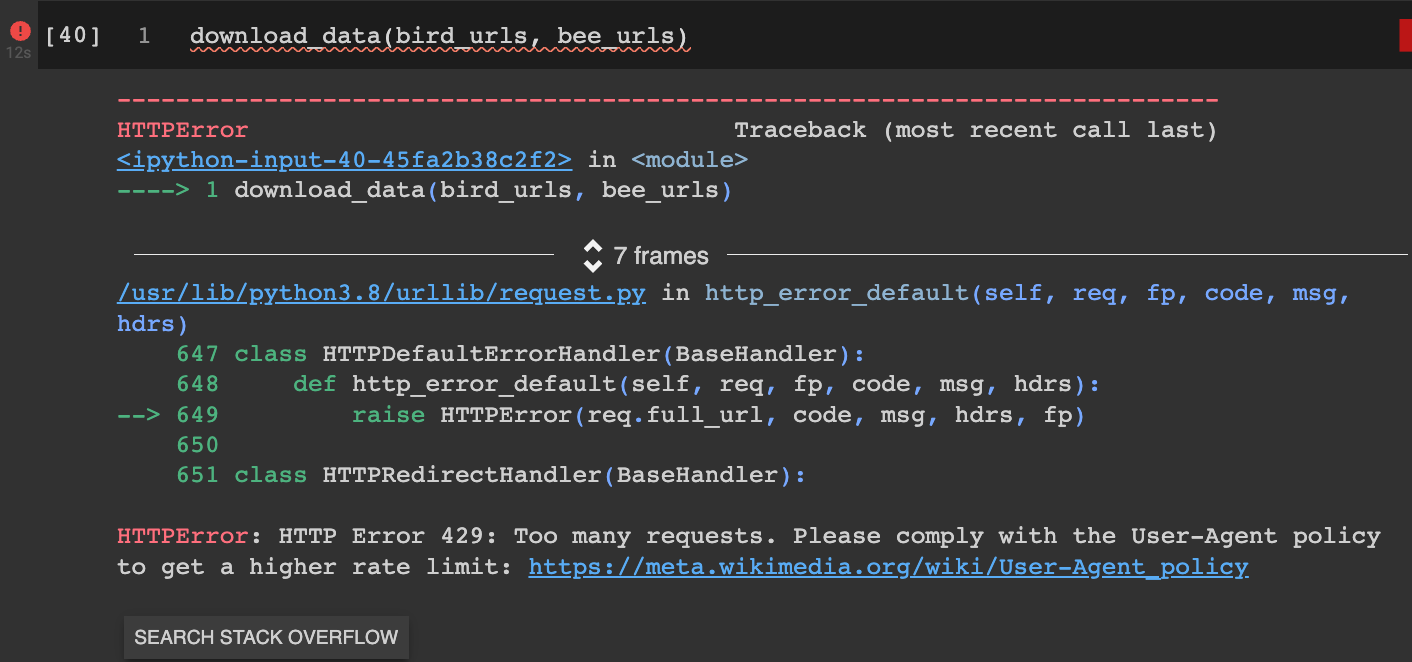
They suggest adding a custom header on their website. After trying a few times to add a header manually, debugging and reading a few stack overflow posts, I just asked GPT to do it:
Me:
The next thing we need to improve is the script we wrote to download the image data. We actually need to pass a header to that function as well. Write a function to download the data. assume that you have access to the “data” folder with bird photos in the “birds” folder and bee photos in the “bees” folder. I want you to write a python script that will create a pandas dataframe. In this dataframe, we will have a “path” and “class” column. You will find all the files in the “data” folder. For each file, you will print its path in the “path” column, and its label (bird or bee), which is its parent folder, in the “class” column.
GPT:
To download images and pass a header to the urllib.request.urlretrieve method, we can use the urllib.request.Request class to create a request object with the desired headers, and then pass this request object to the urllib.request.urlretrieve method. Here is an example of how you can use the urllib.request.Request class to download images with custom headers:
import urllib
import os

# Create the directories if they don't already exist
if not os.path.exists("data"):
    os.makedirs("data")
if not os.path.exists("data/birds"):
    os.makedirs("data/birds")
if not os.path.exists("data/bees"):
    os.makedirs("data/bees")

# Create a list of URLs for the bird images
bird_urls = [
    "http://example.com/bird1.jpg",
    "http://example.com/bird2.jpg",
    # ...
]

# Create a dictionary of headers to pass to the Request
headers = {
    "User-Agent": "My-Image-Downloader/1.0"
}

# Download the bird images and save them to the "data/birds" directory
for url in bird_urls:
    # Create a request object with the desired headers
    req = urllib.request.Request(url, headers=headers)

    # Download the image and save it to the "data/birds" directory
    urllib.request.urlretrieve(req, "data/birds/{}".format(url.split("/")[-1]))

# Create a list of URLs for the bee images
bee_urls = [
    "http://example.com/bee1.jpg",
    "http://example.com/bee2.jpg",
    # ...
]

# Download the bee images and save them to the "data/bees" directory
for url in bee_urls:
    # Create a request object with the desired headers
    req = urllib.request.Request(url, headers=headers)

    # Download the image and save it to the "data/bees" directory
    urllib.request.urlretrieve(req, "data/bees/{}".format(url.split("/")[-1]))
This code will download the images from the URLs in the bird_urls and bee_urls lists, and save them to the appropriate directories. It will also pass a custom header to the urllib.request.urlretrieve method, using the urllib.request.Request class. You can modify this code to suit your needs, such as by changing the URLs or the headers, or by adding additional functionality.
I tried to modify this with GPT, but the code wouldn’t work with headers.
After going back and forth with GPT I found a solution indepentently that worked using requests.
Maybe with enough prompting GPT could find a solution that would work…
Another thing I ended up doing myself because I had no idea how to even verbalize it:
when getting the URLs from the wikicommons page, they were actually link to thumbnails.
Turns out that to get the original sized image, you just have to remove /thumb/ from the URL as well as the trailing part of the URL.
Nothing fancy, but hard to explain in plaintext, so I just did this myself. This allows us to download full size images instead of the thumbnail images that are originally linked:
def parse_url(url):
    """Remove "/thumb/" and trailing link from url so we can fetch high res. image."""
    a, b = url.split('/thumb/')
    return a + '/' + '/'.join(b.split('/')[:-1])
Note that this is probably the ugliest and flimsy bit of code in this entire post! Anyway, this isn’t about me, this is about GPT writing better code FOR me! :).
Moving on! We will be training our model using some vanilla pytorch. So let’s start by parsing our data and preparing our dataset:
Me:
Now, assume that you have access to the “data” folder with bird photos in the “birds” folder and bee photos in the “bees” folder. I want you to write a python script that will create a pandas dataframe. In this dataframe, we will have a “path” and “class” column. You will find all the files in the “data” folder. For each file, you will print its path in the “path” column, and its label (bird or bee), which is its parent folder, in the “class” column.
GPT:
To create a Pandas dataframe with the file paths and labels of the images, we can use the pandas library and the os library. The os library provides useful functions for working with files and directories, such as os.walk which can be used to recursively traverse a directory tree. We can use this function to iterate over all of the files in the “data” folder and its subdirectories. For each file, we can use the os.path.join function to construct the full file path, and the os.path.basename function to get the name of the parent directory (which will be the label for the image). Here is an example of how you can use these libraries to create a Pandas dataframe with the file paths and labels of the images:
Datasets and Dataloaders
import pandas as pd
import os

# Create an empty list to store the file paths and labels
data = []

# Iterate over all of the files in the "data" directory and its subdirectories
for root, dirs, files in os.walk("data"):
    for file in files:
        # Get the full file path
        path = os.path.join(root, file)

        # Get the label for the image (the name of the parent directory)
        label = os.path.basename(os.path.dirname(path))

        # Add the file path and label to the data list
        data.append({"path": path, "class": label})

# Create a Pandas dataframe from the data list
df = pd.DataFrame(data)

# Print the first few rows of the dataframe
print(df.head())
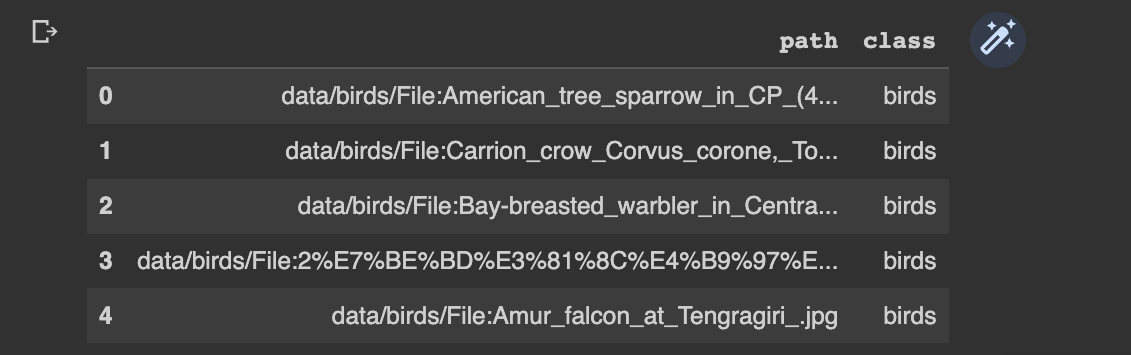
This code will create a Pandas dataframe with the file paths and labels of all of the images in the “data” directory and its subdirectories. It will then print the first few rows of the dataframe to confirm that it has been created correctly. You can modify this code to suit your needs, such as by changing the directory path or by adding additional columns to the dataframe.
Great! I have my pandas dataframe! This is INCREDIBLE!
Alright, we have the data downloaded, and we have it all loaded in a pandas dataframe. Let’s build a dataset and a dataloader for pytorch.
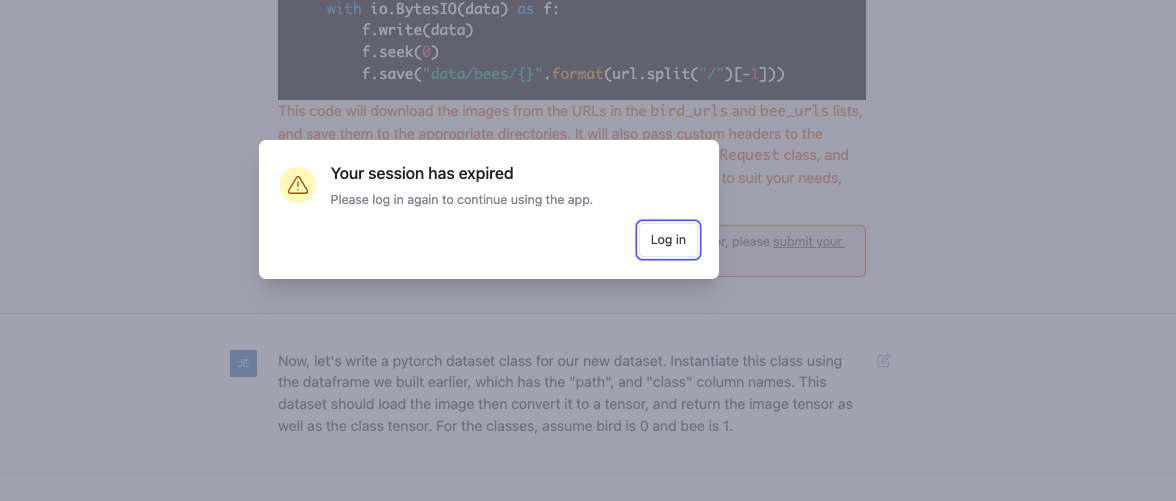
At this point in time, I lost internet briefly at home which interrupted my session. But that’s OK, we still have most of the boilerplate available and we can simply continue where we left off.
Me:
Today, we are going to be implementing an image classification algorithm from scratch together. I will be guiding you step by step and you will be giving me instructions and code to run in order to solve the task. We will need to download data from the internet, pre-process it, declare our models and optimizers and train our model. I will be guiding you step by step through the process. Assume you have already downloaded all the data. You have a python dataframe, df, that has 2 columns: “path”, which has the file path, and “class” which contains the class of the image, either “bird” or “bee”. I want you to first write a pytorch dataset that initializes the class with the dataframe. Each call should return an image tensor that loads the image from the path and resizes it to (224, 224), as well as a tensor representing the class, 0 for bird and 1 for bee.
GPT:
To create a PyTorch dataset, we can subclass the torch.utils.data.Dataset class and implement the init, len, and getitem methods. The init method can be used to initialize the dataset with the dataframe containing the image paths and classes. The len method should return the length of the dataset, which is the number of images in the dataframe. The getitem method should return a tuple containing the image tensor and the class tensor for a given index. Here is an example of a PyTorch dataset class for our image classification task:
import torch
import torchvision.transforms as transforms

class ImageDataset(torch.utils.data.Dataset):
    def __init__(self, df):
        self.df = df
        self.transform = transforms.Compose([
            transforms.Resize((224, 224)),
            transforms.ToTensor()
        ])

    def __len__(self):
        return len(self.df)

    def __getitem__(self, idx):
        path = self.df.iloc[idx]['path']
        image = Image.open(path)
        image = self.transform(image)
        label = 0 if self.df.iloc[idx]['class'] == 'bird' else 1
        return (image, label)
To use this dataset class, we can create an instance of it and pass in the dataframe containing the image paths and classes. We can then use it with a PyTorch DataLoader to load the data for training or evaluation.
dataset = ImageDataset(df)
dataloader = torch.utils.data.DataLoader(dataset, batch_size=32, shuffle=True)
Note: In the code above, we have assumed that the Image class from the PIL library is available. This class is used to load the images from their file paths. You may need to import this class in your code.
from PIL import Image
Also note that we have included some image preprocessing steps in the dataset class, specifically resizing the images to (224, 224) and converting them to tensors. This is necessary because our model will expect the input images to be of a specific size and format.
This is WILD. It also (correctly) predicted I will need a Dataloader!
After a quick inspection on dimensions, it also properly loaded the image to the pytorch [Channel, Height ,Width] convention.
WOW… Ok let’s keep going.
But before, quick note here on silent bugs (probably my fault). The folders (and classes are “birds” and “bees”, not “bird” and “bee”, so I need to modify that label. This would have set everything to be default “bee” without crashing. Otherwise everything looks great).
Defining the model
Alright… let’s define a model. We will fine-tune a pre-trained model. You can’t go wrong with a pre-trained resnet.
Me:
Define a model using pytorch. You can use a pre-trained resnet-18 from torchvision. The input will be an image of size (224, 224)
GPT:
To define a model using PyTorch, we can subclass the torch.nn.Module class and implement the init and forward methods. The init method can be used to define the layers of the model and the forward method defines how the input data is passed through the layers of the model to produce an output. Here is an example of a PyTorch model that uses a pre-trained ResNet-18 from torchvision for image classification:
import torch
import torchvision.models as models

class ImageClassifier(torch.nn.Module):
    def __init__(self):
        super(ImageClassifier, self).__init__()
        self.resnet = models.resnet18(pretrained=True)
        self.fc = torch.nn.Linear(in_features=1000, out_features=2)

    def forward(self, x):
        x = self.resnet(x)
        x = self.fc(x)
        return x
This model uses a pre-trained ResNet-18 model as the base and adds a fully-connected layer with 2 output units to perform the binary classification. The input to the model should be an image tensor of size (224, 224), which will be passed through the pre-trained ResNet-18 and the added fully-connected layer to produce a tensor of size (2) representing the predicted class probabilities. To use this model, we can create an instance of it and call it with an input tensor.
model = ImageClassifier()
output = model(input_tensor)
Note that the example model above is a very simple and not necessarily the best choice for the task. You may want to consider modifying the model architecture or using a different pre-trained model for better performance.
OK. NOW MY MIND IS BLOWN. I never specified the number of out features, it just inferred it from what we were doing. It also correctly tells me that a ResNet-18 is probably not the best model. Standard would be a ResNet 50 which is probably overkill here.
Training the model
Me:
Now write a simple pytorch training loop to train this model for 10 epochs. Use the adam optimizer with an appropriate learning rate. Use the cross-entropy loss.
GPT:
To train a PyTorch model, we can use a simple training loop that involves the following steps: 1 Loop over the number of training epochs. 2 Loop over the training data in mini-batches using a DataLoader. 3 Zero the gradients of the model parameters. 4 Pass the input data through the model to produce output. 5 Compute the loss by comparing the output with the true labels. 6 Compute the gradients of the loss with respect to the model parameters. 7 Update the model parameters using the gradients and an optimizer.
Here is an example of a simple PyTorch training loop that trains a model for 10 epochs using the Adam optimizer and cross-entropy loss:
import torch.optim as optim

# Initialize the model, optimizer, and loss function
model = ImageClassifier()
optimizer = optim.Adam(model.parameters(), lr=0.001)
criterion = torch.nn.CrossEntropyLoss()

# Loop over the number of epochs
for epoch in range(10):
    # Loop over the training data in mini-batches
    for images, labels in dataloader:
        # Zero the gradients of the model parameters
        optimizer.zero_grad()

        # Pass the input data through the model
        outputs = model(images)

        # Compute the loss by comparing the outputs with the true labels
        loss = criterion(outputs, labels)

        # Compute the gradients of the loss with respect to the model parameters
        loss.backward()

        # Update the model parameters using the gradients and the optimizer
        optimizer.step()
GPT
In the code above, we have defined the model, optimizer, and loss function in the beginning of the training loop. We then loop over the number of epochs and, within each epoch, loop over the training data in mini-batches. For each mini-batch, we zero the gradients of the model parameters, pass the input data through the model to produce outputs, compute the loss, compute the gradients of the loss with respect to the model parameters, and update the model parameters using the gradients and the optimizer. This process is repeated for each mini-batch and for each epoch until the training is complete.
GPT
Note that the example training loop above is very simple and does not include other important aspects of training such as evaluating the model on a validation set, adjusting the learning rate, saving the model, etc. You may want to consider adding these components to your training loop for better performance and stability.
Ok. at this point, TRIPLE WOW. I didn’t want to get things too complicated when trying this out so I figured I’d just worry about a training set. Forget the validation and test, I would be impressed to get as far as training. But now it’s telling me (correctly!) that I didn’t consider a validation set abd that this is borderline bad practice (IT IS!)!!! I mean, this was just for fun to begin with, I never thought I’d get this far…
Let’s train this thing. We can just evaluate it on images we haven’t trained on.
When we start training, we run into a bug:
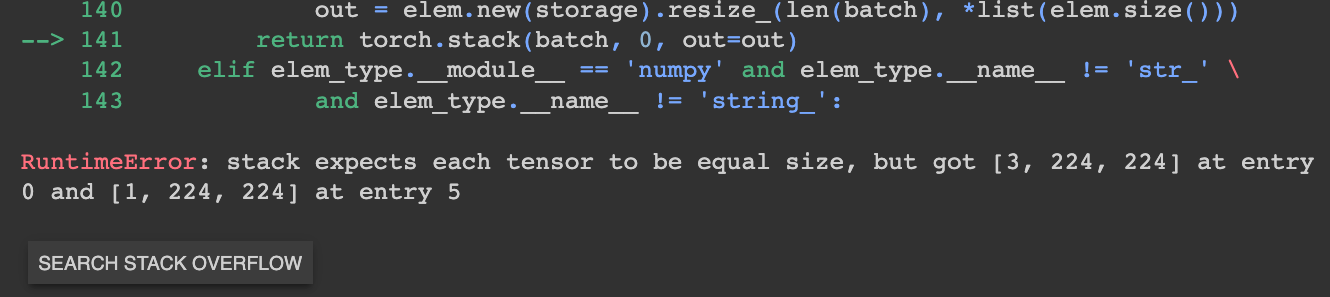
This is a typical bug that I didn’t anticipate, we might have a grayscale image somewhere in our dataset… let’s just modify our code so that images are always RGB.
I also never specified to train on the GPU, which we have access to, so let’s make sure we do this on GPU:
Me:
Now write a simple pytorch training loop to train this model for 10 epochs. Use the adam optimizer with an appropriate learning rate. Use the cross-entropy loss. Make sure that the GPU is used if it is available.
GPT:
To train a PyTorch model on the GPU, we can use the to method of a tensor to move it to the GPU memory and the cuda method of a model to move it to the GPU. Here is an example of a simple PyTorch training loop that trains a model on the GPU if it is available:
import torch.optim as optim

# Initialize the model, optimizer, and loss function
model = ImageClassifier()
optimizer = optim.Adam(model.parameters(), lr=0.001)
criterion = torch.nn.CrossEntropyLoss()

# Move the model and the loss function to the GPU if available
if torch.cuda.is_available():
    model = model.cuda()
    criterion = criterion.cuda()

# Loop over the number of epochs
for epoch in range(10):
    # Loop over the training data in mini-batches
    for images, labels in dataloader:
        # Move the mini-batch data to the GPU if available
        if torch.cuda.is_available():
            images = images.cuda()
            labels = labels.cuda()

        # Zero the gradients of the model parameters
        optimizer.zero_grad()

        # Pass the input data through the model
        outputs = model(images)

        # Compute the loss by comparing the outputs with the true labels
        loss = criterion(outputs, labels)

        # Compute the gradients of the loss with respect to the model parameters
        loss.backward()

        # Update the model parameters using the gradients and the optimizer
        optimizer.step()
GPT
In the code above, we have added a check to see if the GPU is available and moved the model and the loss function to the GPU if it is. We have also added a check to move the mini-batch data to the GPU if it is available before passing it through the model. This allows the model to be trained on the GPU if it is available, which can significantly speed up the training process.
GPT
Note that the example training loop above is very simple and does not include other important aspects of training such as evaluating the model on a validation set, adjusting the learning rate, saving the model, etc. You may want to consider adding these components to your training loop for better performance and stability.
So how did we do? Let’s take GPT to its word and generate a validation set… We will take 10 examples of birds and 10 examples of bees that we haven’t trained on.
Me:
Now we want to evaluate the performance of our model. Write a function that downloads an image from a URL, converts it to a tensor, passes it through our model and prints “bird” if it predicts a class 0 or “bee” if it predicts class 1.
GPT:
To evaluate the performance of a PyTorch model, we can create a function that takes an image URL and a trained model as input, downloads the image, converts it to a tensor, passes it through the model, and prints the predicted class. Here is an example of such a function:
import requests
from PIL import Image

def evaluate_model(url, model):
    # Download the image from the given URL
    response = requests.get(url)
    img = Image.open(BytesIO(response.content))

    # Preprocess the image
    transform = transforms.Compose([
        transforms.Resize((224, 224)),
        transforms.ToTensor()
    ])
    img_tensor = transform(img)

    # Pass the image tensor through the model
    output = model(img_tensor)

    # Get the predicted class
    _, pred = torch.max(output, dim=1)

    # Print the predicted class
    if pred == 0:
        print("bird")
    else:
        print("bee")
In the code above, we use the requests module to download the image from the given URL. We then preprocess the image using the same transforms that we used for the training data. The preprocessed image tensor is then passed through the model to produce the output. We use the torch.max function to get the predicted class and print it.
To use this function, we can simply call it with the URL of an image and the trained model as arguments.
url = "https://www.example.com/image.jpg"
model = ImageClassifier()
evaluate_model(url, model)
Note that the example function above is very simple and does not include error handling or other important aspects of model evaluation such as model performance metrics. You may want to consider adding these components to your evaluation function for better reliability and interpretability.
The BUG
Ok… now time for the REAL killer bug. I knew that a model like this should converge very easily. So, I just got a bunch of random URLs of birds and bees that weren’t part of training expecting to see more or less perfect results.
That’s when I noticed my model was collapsing. All predictions were always either bird or bee. No matter how well my training was doing. Everything seemed fine. I looked through the code over and over. I couldn’t figure it out.
After a bunch of debugging, a break to go climbing (thank you Erika for getting me away from the computer ❤️ ), and coming back home, I finally found the bug. This one was NOT obvious at first glance.
Can you figure it out?? It’s very subtle.
When doing the evaluation, we are doing it one image at a time.
However, vanilla resnets, which we are using, use batch-norm, which as the name suggests expects batch of images to compute statistics.
Without turning it off for evaluation, you compute statistics over a single image, which throws off all predictions and lead to a collapse.
The fix was very easy: just add model.eval() before running the evaluation. But finding this fix, I’m not sure how to prompt GPT for that just yet.
After fixing it, the model was back to good performance on my sketchy, completely un-scientific test set of 6 unseen images with 100% accuracy.
Conclusion
You can find all the code in this colab. Note that I didn’t explicitly always ask for functions (still learning how to interact with my GPT buddy), so whenever scripts came out, I just wrapped it in functions. I tried to intervene as little as possible.
This has gone beyond any expectation of anything I would ever thought a large language model could do. I really hope that I can continue interacting with this version of GPT. Please, OpenAI, keep it open! And thank you for realeasing it!
Thanks for reading!
Comments